Showing posts with label Mistakes. Show all posts

Monday, January 12, 2015

Book review: Eric Toensmeir's Paradise Lot - parallel universe?

My yard Toensmeier's yard

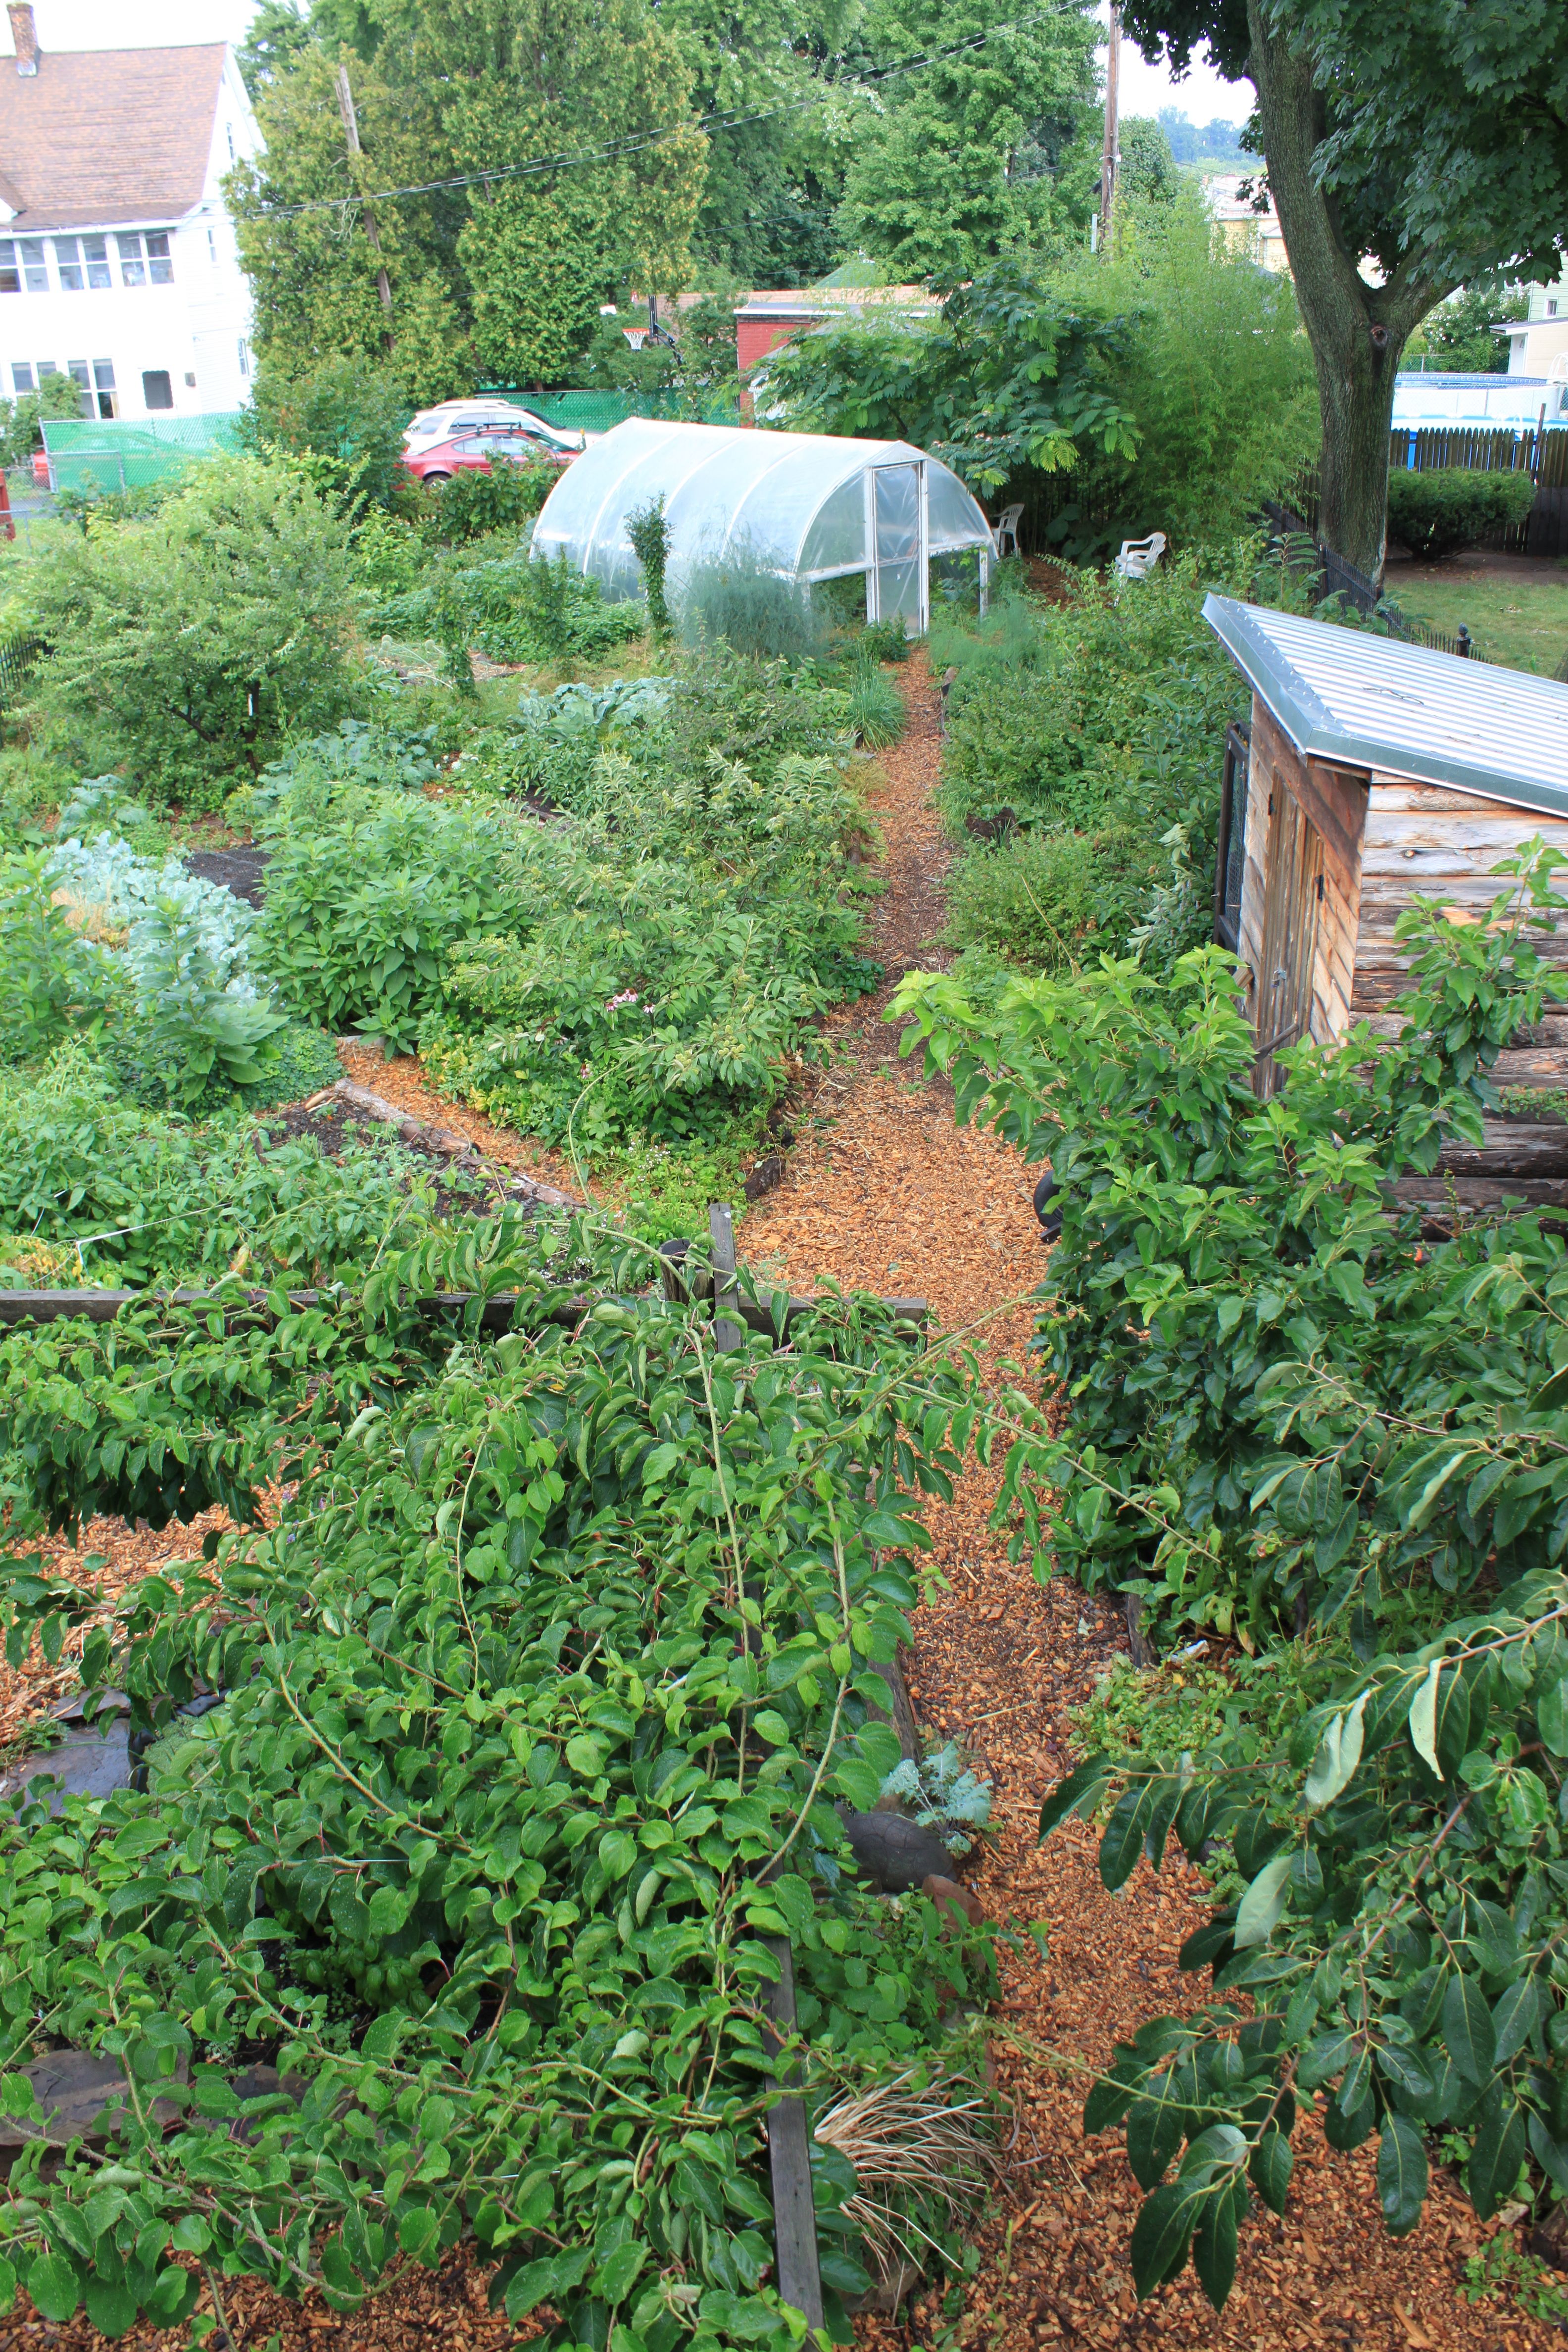
My project took place in Portland OR, his on the other side of the continent in Holyoke MA. My lot was two tenths of an acre, his lot half that. But besides differences in space for trees, and somewhat different plant palettes, Eric Toensmeir's account in Paradise Lot of applied permaculture reads like a parallel universe of my own experimentations with urban lot rehabilitation and perennial polycultures. We each started with infertile and unpromising soil, but guided by permaculture literature from other regions and with the help of gardening partners (romantic in my case; friend Jonathan Bates in his), we embarked on labors of faith towards similar goals of abundant food production and restored habitat health.

And we both succeeded. I've documented most of my experiments, successes, and failures on this blog. Toensmeier has shared much of his plant knowledge, from which I've drawn heavily, in the appendices of Edible Forest Gardens: Volume Two (coauthored with Dave Jacke), his book Perennial Vegetables, and his DVD Perennial Vegetable Gardening. But besides early site analysis in Edible Forest Gardens, a few video clips from garden tours, and the Apios Institute wiki behind a paywall, we haven't gotten many details on the overall transformation of his lot or on his polyculture explorations. Paradise Lot provides a fairly thorough account of how Toensmeir and Bates selected, analyzed, amended, sheet-mulched, planted, and enlivened their site. Though the theoretical process is well described in various forest gardening books, it doesn't hurt to have another case study providing specific details of how a site plan can evolve over the years.

Many individual species are briefly described, without many surprises for those who have already devoured references like Perennial Vegetables and Martin Crawford's Creating a Forest Garden. Most exciting for me is Toensmeier and Bates covering new ground with perennial polycultures (literally). It seems they encountered many of the same challenges I had with perennial polyculture design, especially from lack of hands-on experience growing and using individual species. It's difficult to assemble successful mixes without intimately understanding the life cycle, growth habits, and harvest season of each component. Amusingly, they created a hog-peanut/gooseberry mess similar to, though not as bad as, my infamous gooseberry/stinging nettle polyculture. A great example of why we need to share information about what works and what doesn't, to reduce effort wasted on demonstrably bad combinations!

Disappointingly, the book ends before Toensmeier has had a chance to develop many successful polycultures, similar to my timing of moving before getting to implement my own new perennial polyculture designs. Even so, there are some succesful polycultures and further hints and lessons in the book. Notably, he arrived at the same conclusion I did: low, spreading groundcovers are critical components. He describes success with some strawberry species, a violet, and some native plants, but without many details beyond that of what specific crops to fit together.

I find it very promising that we achieved similar positive results in fairly different climates. We both successfully rehabilitated trashed urban lots into land that could support both humans and non-humans. We both, through the simple techniques of heavy mulching to build soil and planting a wide variety of perennials, created habitat for greater numbers and species diversity of insects, birds, and other life. By selecting mostly edibles for our plantings, we both wound up with abundant harvests of low-maintenance perennial vegetables. (And we both had a shortage of perennial greens in the summer; apparently this has more to do with the life cycles of perennials than with the summer drought of the Pacific Northwest.) We both had similar success allowing natural predators to handle pest outbreaks. We both put a lot of time up-front into planning and design, but both made lots of mistakes easily avoidable by others learning from our examples, so I feel pretty confident that our achievements are replicable by anyone who takes this approach with even a minimum of planning and research.

I felt surprised by how much focus Toensmeir put on nitrogen-fixers, as I realized a couple years into our endeavour that one person's urine fertilizes 4000-5000sf of forest garden, the size of their entire lot. Despite cycling the urine from four adults into the yard, Toensmeier is still carefully planning N-fixing plants at the end of the book. Perhaps they all spend so much time off-site that they can't capture enough urine, or perhaps Toensmeir never thought to calculate this?

The book also features a strong subplot of the two bachelors hoping to attract mates, with as much success as in their gardening! Personally, I was much more interested in the plant-geek narrative, but I'm sure many readers will appreciate the human interest story balancing out the site analysis and gardening.

Toensmeir explores some of the dynamics of the neighborhood, the town of Holyoke, and the even broader community. I found his vague hope of inspiring change through personal example to be unconvincing. I'm fairly jaded by my own experience in Portland attempting to model something approximating urban self-sufficiency and sustainability: not only were our inputs of free wood chips and dumpstered waste streams unscaleable to more than a small fraction of the entire city, and not only did I conclude that Portland would have to kick out half the population even in a wildly optimistic scenario of everyone doing a better job than we'd managed, but only a handful of the people who toured our yard actually adopted perennials to any great extent. So I'm pessimistic (or realistic) about the inability of cities to ever support their populations in any sustainable manner.

But that's fairly tangential to the main focus of the book, and certainly anyone interested in urban, suburban, or rural zone 1 and 2 gardening can and should learn from this case study. It's a quick, fun, and relatively light read. Enjoy!

Thursday, July 17, 2014

Hoophouse on the Slug Moat

In fall of 2011 I built our slug moat to protect nursery pots from slugs while providing rainwater catchment and other typical aquatic benefits. A few months later, to prepare for spring and make the most of the contraption, I added a hoophouse over the nursery table to provide a warmer, protected microclimate for the plants, without interfering with the use of the pond as an irrigation source.

Duck Integration

I wanted ducks to use the pond, but knew that with unrestricted access they would trash such a tiny area, destroying all plants and fish and filling the pond with poop and stirred up muck. To exclude ducks from enough of the pond to allow sheltering of fish and growth of poop-filtering cattails, I put a fence across the middle of the pond and around the excluded perimeter. Ducks could still be allowed into the protected area periodically, under close supervision.

I constructed a little ramp to make it easier for the ducks to get in and of the water.


Skirting

Using thin plastic which had wrapped our lumber deliveries, I constructed a skirting sandwiched onto the table sides and posts with lathe and hanging to the water below. I hoped this would create a lower seal preventing air from coming up into the nursery table.

Hoophouse

Next, I built a ventable upper enclosure for the plants from clear vapor barrier plastic left over from the house project. I created the end "wall" closest to the house by rolling a piece of lathe into a short piece of plastic, clamping it closed with three strong binder clips. I secured the lower half of this plastic to the vertical posts with more lathe, and tacked a couple of nails into the posts to allow the wall to be "hung" up for closure, or unhooked from the nails to half-open that end of the hoop house.

Since I didn't have posts to work with at the far end of the table, I used a single large piece of plastic for the rest of the hoop house, supported by plastic hoops screwed to the sides of the table, and draping down as the far wall. I used more binder clips to seal the junction between the large piece of plastic and the end wall, unclipping as necessary to move the sheets for ventilation.

I secured the sides by creating a small gap between the existing pallets on top and new wood I attached to the table sides just below. Tucking the plastic into the gap and wedging in some lathe created a strong seal, while allowing easy access or ventilation of the sides by pulling out the lathe.

Successes

On the whole, it worked. It definitely created a warmer microclimate and allowed faster early spring growth of the plants. Using all scrap materials, it had a distinctly amateur look to it, but was fairly easy to use for ventilating and accessing plants. I'm especially pleased with the side attachments of wedged lathe, which worked surprisingly well.

Problems

Despite lathe sandwiching it to the posts as low as possible, the lowest part of the skirting, pushed outwards by the concrete pier blocks, tended to blow around, failing to make a reliable seal. Often the skirting got stuck on the perimeter fence, potentially negating the slug-proofing function of the slug moat. The plastic scrap I used was just barely long enough to reach the water surface; with more material to work with I could have wrapped the bottom with some weights to ensure a straight drop to the pond.

The cross fence within the pond was of very flimsy construction and even flimsier attachment. A fence could have been secured to two of the table legs and anchored against their concrete piers stacked in the water below, but the placement of the table within the pond didn't make sense for that. It would have created either too tiny a pond for the ducks to use, or too small an area for plants to grow without duck disturbance.

The perimeter fencing, secured very loosely with metal stakes salvaged from political yard signs, also failed to inspire confidence. Neither the perimeter nor the internal fence were tested long-term against inquisitive ducks, and I suspect both would have required some adjustment and fiddling.

The binder clips came loose easily from slippery plastic, both where I wrapped lathe into the plastic to create the end wall and especially where I tried to clip the two upper sheets together. Again, I was using pieces just barely long enough to meet, so any significant wind put a lot of force on the joints. Slightly longer pieces with more overlap and slack would have helped. Ultimately the system needed a better connector - perhaps snap-on grommets.

Saturday, July 12, 2014

Perennial Greens Planting Plan

Zone 1, extending into zone 2. From bottom center, working counter-clockwise:
Giant sea kale, sweet cicely in seed, turkish rocket, zebra mallow in flower, perennial kale in seed, lemon balm, french sorrel in seed, borage in flower, elephant garlic in flower, sylvetta arugula in flower, and nipplewort.
Also skirret & chinese dogwood in background, with crocosmia in foreground.

Two mistakes I made in my perennial vegetable experimentations in Portland:

  1. I overplanted perennial greens, more than we could possibly eat.
  2. I planted the greens over a large area, forcing more traversal of the yard than necessary. Though walking the yard to pick greens helps keep an eye on everything, it's inefficient to go further than necessary on a nearly daily basis.

Before we sold the house, I was consolidating a core set of perennial greens into approximately 100 square feet of beds closest to the house. This brought the front yard garden into better alignment with design by zones, with a tight zone 1 producing the majority of the daily pickings for two adults (leaves & flowers, salads & cooked), and freeing up zone 2 for root crops and less frequently harvested vegetables. I still envisioned picking from zone 2, from deliberate plantings and from edible weeds, a few times a week for variety and to augment zone 1 production.

This design took advantage of the fact that, for much of the year, the house shades most of the front yard area closest to it (especially after we raised the house 3'.) Most of the perennial greens should do well in partial to full shade, whereas the root crops and annuals generally need more sun. Most herbs also want full sun, and we found we didn't need to pick them with each batch of greens, so the larger ones made more sense for us in zone 2.

Writing this up two years later, I don't remember the exact number of which plants I moved into zone 1, but I believe I've come close below. It's a good starting point; you'll need to experiment anyway with what works well in your site and what you like to eat. Regardless of the exact species composition, the end result of densely planted perennials should be a yield of greens requiring little to no work besides harvest - more or less no need to dig soil, replant, or weed. (And year-round, at least in Portland and similarly mild winter climates.)

Large Plants

Usually planted 2-3' apart. You can perhaps get away with closer spacing in a heavily harvested zone 1, but I'd be inclined to still give them full spacing.

QtyLatin nameCommon name
1Agastache foeniculumAnise hyssop
1Brassica oleracea acephalaTree collards
3Brassica oleracea acephala'Western Front' perennial kale
1Crambe cordifoliaGiant sea kale
2Crambe maritimaSea kale
1Foeniculum vulgareFennel
2Malva sylvestris mauritianaZebra mallow
1Malva moschataMusk mallow
2Melissa officinalisLemon balm
1Myrrhis odorataSweet cicely
2Rumex scutatus or R. acetosaFrench Sorrel
6 sfScorzonera hispanicaScorzonera

Groundcovers

These can be planted under and around the large plants, to exclude weeds and provide bonus greens & flowers.

Latin nameCommon name
Barbarea vernaWintercress
Campanula portenschlagianaBellflower
Campanula poscharskyanaTrailing bellflower
Claytonia montiaMiner's lettuce
Claytonia sibericaSiberian miner's lettuce
Diplotaxis tenuifoliaSylvetta arugala
Origanum sppOregano species
Oxalis oregonaRedwood sorrel
Rumex acetosellaSheeps sorrel
Sanguisorba minorSalad burnet
Stellaria mediaChickweed
Taraxacum officianaleDandelion
Thymus sppThyme species
Viola sppViolets

Bed Edges

We used a lot of Allium greens, finding them much easier to grow than bulbing onions. These work well along the edges of beds, helping delineate the pathways.

Latin nameCommon name
Allium ampeloprasumElephant garlic / Leek
A. cepa 'proliferum'Egyptian walking onion
Allium cernuumNodding onion
Allium fistulosumBunching onion
Allium sativumGarlic
Allium schoenoprasumChives
Allium tuberosumGarlic chives

Zone 2 Greens

If you have more room available, I would experiment with these. For species already listed above, numbers given are in addition to the quantity in zone 1. These are just for greens and flowers; not considering root and seed harvests of things like yellow asphodel and good king henry.

QtyLatin nameCommon name
1Agastache foeniculumAnise hyssop
5Anthriscus sylvestrisWoodland chervile
2Aquilegia vulgarisColumbine
4Asphodeline luteaYellow asphodel
2-3Bunias orientalisTurkish rocket
4Campanula rapunculoides, C. persicifolia, and other tall speciesBellflowers
10Chenopodium bonus-henricusGood King Henry
2Crambe maritimaSea kale
1-2Foeniculum vulgareFennel
1Levisticum officinaleLovage
1Lycium barbarumWolfberry
6sfMentha spicataSpearmint
1-2Myrrhis odorataSweet cicely
3-4Oenothera biennisEvening primrose
3Rumex scutatus or R. acetosiaFrench sorrel
2Smyrnium olusatrumAlexanders
1Symphytum officinalisComfrey
10sfUrtica dioicaStinging nettles

Zone 2 Stems & Shoots

Other vegetables nice to grow for something other than greens and flowers.

Latin nameCommon name
Arctium lappa or A. minorBurdock
Asparagus officinalisAsparagus
Maianthemum racemosumFalse solomon's seal
Petasites frigidusSweet Coltsfoot
Petasites japonicusFuki
Polygonatum biflorum and P. commutatumSolomon's seal
Rheum x cultorumRhubarb

Zone 2 Weeds

Volunteers that often need to be kept in check. We generally ate these rather than weeding per se.

Latin nameCommon name
Borago officinalisBorage
Calendula officinalisCalendula
Cardamine unknownPopweed
Geum urbanumClove root
Lamium purpuruemPurple dead nettle
Lapsana communisNipplewort
Phytolacca americanaPokeweed
Solanum nigrumBlack nightshade
Taraxacum officinaleDandelion

Sunday, December 15, 2013

Photo album: Going Garden, June 2013

I created an album of photos taken by Jasmine van den Heuvel in June 2013, of my old forest garden in Portland. The new owners have changed a few things around in their first year and a quarter:
  • Replaced half to two-thirds of the zone 1 perennial beds with annual beds
  • Removed the double row of failing raspberries near the house and mostly left it open (at least for now?) as a big path
  • Ironically, after we removed the herb spiral which didn't work very well and dug a catchment pond, the new owners filled in the pond and made a little herb spiral in its place
  • Replaced the dead olive in zone 2 and its perennial understory with annuals
  • Replaced a large swath of the former driveway, including a sickly or dead pawpaw circle, with a strawberry mound
  • Planted some new trees: figs on west side of house, pawpaw in back yard
  • Removed the backyard chicken paddock fences
  • Replaced the wood shed in the backyard with a second chicken coop (or run?) next to our original coop


View the album

Sunday, January 29, 2012

House heat update & unintended consequences

Fuel Used To Date

With the whole house almost completely insulated, we've burned about 38 cubic feet of firewood this winter, a bit less than 1/3 cord.  (One cord of wood is a pile 4' x 8' x 8', or 128 cubic feet.)  We've been keeping the sunspace between about 50-62F, with the north part of the house generally a few degrees cooler during the day, but dropping to the same temps overnight.  We've made a fire every 2 or 3 days on average.  We made at least 1/3 of those fires for guests or for house showings, not because we needed the heat for ourselves.  We're probably on track to use a total of 4/10 a cord of wood.  We scavenge all our wood for free, but market rate is around $150/cord, so we'll use about $60 worth of wood for heating.

We still have extra heat input from showers (about 3 per week) and from cooking on our gas stove (8 therms=800,000 btus since Oct. 18, or the equivalent of 1/25 cord of wood.) This winter has seemed unusually sunny, so our passive solar heat gain has been higher than in a normal winter.

Future Steps

I'm fairly pleased with our relatively low energy consumption this winter, but we're still far short of our original goal of heating the house entirely from on-site resources.  Some pieces we're still missing:

  • Insulation for all house windows, especially sunspace windows, for better overnight heat retention
  • Finish insulating attic
  • Rocket stove instead of normal wood stove, for much greater efficiency in cooking and heating
  • Install our 5 solar hot water panels and run the hot water through the radiant floor tubing
  • Full growth of trees and shrubs for fuel from pruning & coppicing

Unintended Consequences

In past years, we used our daily fires through the winter to cook our jerusalem artichokes (aka sunchokes), converting the inulin to digestible sugars after 6-8 hours of pressure cooking. That worked well when we made fires daily. Now, with fires only every 2nd or 3rd day, it takes almost a week to cook the 3 pounds of sunchokes which our pressure cooker can hold. Last winter I ate twice that much per week. We could partially solve this problem with an additional and/or larger pressure cooker.

Same problem with processing acorns using our preferred hot leaching method. However, since we don't rely on a pressure cooker, we can "scale up" by using multiple pots of large size to leach the acorns, rather than relying on daily fires.

Similarly, without frequent fires, we're having a much harder time drying nuts, herbs, processed acorn meal, seeds, laundry, wet winter clothes, etc. Now I wish we hadn't sold our solar dehydrator last fall; we could have used it on our sunny winter days when we weren't making fires. If we were staying here longer, we'd probably set up the front porch or carport for initial drying of clothes, moving them inside for final drying as needed. Better yet would be a space protected from rain but exposed to the sun, such as my recent idea of an enclosed greenhouse to the south of our sunspace.

Saturday, December 03, 2011

Ecoroof Grant Report: Addendum

See Ecoroof Grant Report for the main write-up. This is an addendum to that post.

During a site visit from Portland BES staff to see the ecoroofs, Tom Lipton suggested two changes to our ecoroofs:

Mulching exposed pond liner


On the garage and carport roofs, we had left about half the pond liner exposed. (See original report for details.) That makes the liner vulnerable to degradation by sunlight, making it last only 20 years instead of the 40+ years expected from a liner covered by soil media. Tom has been experimenting with douglas fir needles as a thin mulch on a light-weight ecoroof of his own, and has been having good success, so he suggested that we apply something similar.

In some areas we moved soil media over the exposed liner in a very thin layer. In the rest, we applied a thin layer of pine needles or bamboo twigs with leaves. Both materials should decompose slowly, providing an effective sun blocking mulch, without holding water and thus adding excess weight to the roof. They will likely require periodic reapplication as they decompose, though perhaps some of the hardy sedums will eventually colonize the areas and act as permanent cover over the thin layer of organic matter.

Expanding sunspace roof drainage channel


We have ~290 ft² of metal roof from the rest of the house draining into the sunspace roof. I created two small channels using 4” diameter drainpipes. Tom mentioned potential problems he'd seen in similar situations in winters when we get alternating freezing and thawing weather, creating ice dams around the drain. He suggested enlarging one of the drain areas to minimize that risk. I removed the drainpipe from the western channel and dug out the soil media to leave just a thin layer for pond liner protection.

Sunday, October 09, 2011

Fixing the graywater tub

Earlier this year, I described our constructed wetland for graywater treatment, and mentioned problems with much of the water infiltrating through the dirt instead of overflowing into our second tub. Today I attempted to correct the problem.

The Problem

This picture shows the upper edge of the hot tub which I buried in the ground. I "planted" the tub too low, so we added lots of soil around the edge of the tub, and wood chips on top of the constructed wetland. The wood chips broke down into lovely soil, and it all wicked water out of the tub and into the surrounding paths. Small flows of water from sinks, even prolonged activities such as washing dishes, never made it into our second tub of "treated" water, so we never got to use most of our water for irrigation. We only got water overflows when we took a shower.

The white pipe in the photo carries graywater from the house and deposits into the tub.


The Solution


I dug around three sides of the tub, exposing the upper edge, and removed 2-3" of dirt and gravel on the inside surface. I wiped that 2-3" of tub edge clean, then squeezed a bead of PL Roof & Flashing Sealant onto the cleaned edge. I cut some scrap pond liner (left over from our ecoroof projects) into approximate 3 1/2" - 4" tall strips, and pressed it into the sealant bead to effectively raise the waterproof edge of the tub by about 2 1/2" on three sides. I did not raise the fourth side, where the water is supposed to overflow.


After the sealant cures overnight, I'll refill the interior of the new pond liner extension with gravel, and bring dirt back up to the outside edge of the pond liner. This should prevent the worst of the "wicking" and allow water to overflow as originally planned.

Thursday, July 28, 2011

Reflections on This Life Is In Your Hands by Melissa Coleman

My strong interest in the realities of homesteading and community living drew me to Melissa Coleman's This Life Is In Your Hands: One Dream, Sixty Acres, and a Family Undone; her gripping story of her family's disintegration with its familiar childhood perspective kept me reading until I'd finished the same day. If you have any interest in these subjects, I highly recommend this as an engrossing, quick and easy read.

Besides saying that, I don't want to review this book so much as jot down my reactions and reflections. You can read more detailed synopses of the book elsewhere, but in short, Melissa describes her first seven years growing up on a rural Maine homestead with her parents Eliot (well known in organic agriculture circles) and Sue Coleman, next to and on land purchased from their mentors Helen & Scott Nearing. Much of the book revolves around the accidental drowning of Melissa's younger sister in a pond on the property, and the assumption of blame for her death.

My Thoughts & Observations

Homesteading in Maine is difficult. I don't want to work so hard during the short growing season of summer and fall to prepare for a bitterly cold, long winter. Not that I didn't already know that.

Organic agriculture is difficult. I don't want to cut down an acre of mature forest by hand, then cut off the roots of the stumps to pry them out by hand, just to create growing beds I have to dig every year to grow vegetables I have to plant, water, and weed every year. Not that I didn't already know that.

Trying to get a homestead up and running with a newborn baby is difficult. Not that I hadn't already guessed that.

Trying to keep a homestead running with a 3 year old and a newborn baby is even more difficult. Usual comment applies.

Trying to keep a failing marriage from deteriorating further and a homestead running with two children and yet another newborn baby is...go figure...even more difficult yet. Usual comment, plus some head-scratching at the seeming inability of otherwise rational folks to understand the effects of popping out babies. (I can never contemplate global demographics for very long; I quickly scratch my scalp raw.)

Interesting that besides the seasonal reappearance of sparrows each spring, and some wild berries, Melissa doesn't talk about their landbase. Perhaps she just didn't want to add that theme to an already dense book, or perhaps this reflects the disconnection from landbase that seems to regularly accompany agriculture.

Melissa mentions a couple of times early in the book that their family bought in a lot of staple foods like nut butters, oils, and grains; plus occasional luxury items like oranges from Florida. Later on I think she mentions growing potatoes, but otherwise doesn't address staple crops again, so it's not clear whether they ever transitioned to growing their staples. I'm guessing they only grew or foraged their produce, root crops, milk, berries, and fruits; selling extra veggies to pay for imported staples along with other cash expenses like their car. So they never really achieved the sort of homesteading self sufficiency we're seeking.

The Colemans' adherence to a vegetarian diet made life harder than necessary. Besides possible nutritional imbalances causing or exacerbating Sue's depression and Eliot's hyperthyroidism, the diet led to inefficiencies:

  • The family only needed one male goat for fertilization, so Eliot killed and buried any male kids as soon as they were born, a waste of substantial energy invested by the mother goat.
  • The Colemans originally kept chickens for their eggs, but after a few years decided the chickens were too many extra mouths to feed during the food-scarce winters, so got rid of the whole flock. This baffled me since our own hens provide our most labor-efficient protein, fat, and calorie harvests. Eventually I figured out that since the family wouldn't eat their chickens, they couldn't utilize the normal temperate climate adaptation of slaughtering most of the flock in fall or winter, keeping just a few hens and a rooster to rebuild the flock the following spring.
  • They probably missed out on labor efficient opportunities to hunt deer or other meat, which one of their neighbors did to the disgust of the vegetarian Nearings.

Don't design a system that requires you to operate near maximum capacity almost 100% of the time. (Or fall into such a system through lack of design.) Limited slack means any significant disruption has extreme consequences. See the history of China for example, with its population maxed out with all land cultivated as extensively as possible, leading to serious famines somewhere in the country almost every year for two thousand years. For the Colemans, who were running at full speed with just Melissa and the homestead to deal with, the expected arrival of their second daughter drove Eliot to exhaustion building an addition to the house. This apparently started his decline in health. Even worse, it initiated or expanded a chasm with Sue as he couldn't meet her need for connection.

Eliot constantly pushed himself. As an athlete in college he kept seeking the next mountain to climb, and apparently he took on homesteading partly as a "mountain with no top," a challenge he could never fully conquer. As soon as he achieved some success with homesteading, he threw himself into advocacy of organic farming, first publishing newsletters and organizing at a regional level and in later years taking multiple long research trips to Europe. This workaholic approach, so often respected as a model of modern success, trashed his health and his marriage as he used work as refuge from emotions and his growing distance from Sue. Eliot reminded me a little bit of myself in years past when I moved from obsession to obsession (Roger Zelazny website, bootleg taping, Kucinich campaign, etc) to distract myself from the pain of civilization. I've slowed down and opened up in recent years, though at times I've used the house project to avoid dealing with relationship challenges.

In the early years Sue generally shouldered all the necessities of child care plus heavy work loads, but even early in Melissa's life Sue had occasional breakdowns and mild depression from the strain and stress of their endeavor. Her exhaustion grew with a second and then third child, Eliot's decline in stamina with his health problems, and his increasing absences as he pursued teaching and research away from the farm. She grew emotionally distant from Eliot, eventually suspecting him of involvement with the cute young interns present every summer, but unable to discuss it with him. She became less and less capable of engaging with life and her children, spending more time sleeping, fasting for the resulting blood sugar spikes, or just emotionally "checked out" as she went through her day.

Sue and Eliot's marital break-up despite fairly successful homesteading demonstrates the overwhelming importance of communication and relationship in these projects. The "hard skills" of growing food, building shelters, and providing water are fairly easy to learn and implement; us modern civilized folks have a much harder time learning to live together and resolve conflict.

Personal Reflections

I see Tulsey going through some of Sue's struggles. When I met Tulsey working on the Kucinich campaign she seemed strong and fully capable as we ran the Portland office. But as I got to know her better, I learned of her brittleness following a long difficult marriage and divorce, years of overworking herself at the small business she and her husband owned, and her mother's death. In the years since, Tulsey has bounced between breakdowns and confident accomplishments, happily with the balance tipping much more to the latter as she's healed herself from past stresses. The house project of the last two years has rekindled a lot of stress, and though Tulsey is mostly coping with it well, it's taken its toll. Reading Melissa's story emphasizes the importance of keeping our workloads manageable in Hawaii, not trying to do too much at once. Always good advice (one of the principles of permaculture, in fact), and even more important when starting from a depleted state.

I also see my mom in Sue's story and myself in Melissa's. As the oldest of three siblings, and with our parents' relationship following a similar trajectory, Melissa's descriptions of her parents' stresses and her own fears and loneliness (felt in the gut more than intellectually recognized) felt painfully familiar to me, raising several tears and even outright crying two or three times. Looking back now, I can better appreciate the strains my mother must have felt working multiple jobs to care for the three of us, breaking down from time to time with the stress of it all.

Towards the end of the book and her parents' relationship, Melissa describes a memory laden with emotions difficult to articulate but so poignantly recognizable from my own long unvisited, time blurred memories of childhood. Coming home from a school where she doesn't fit in, longing for her parents' attention as their limited spare energy goes to her younger siblings, and living with constant background anxiety about her family's future, Melissa trips and lands hard. Convinced that she broke her arm, she rushes home in search of sympathy. Discovering both parents gone, she begins running back and forth, back and forth, cradling her arm even as the diminishing twinges reveal the insignificance of her injury, wanting to preserve her fresh moment of pain and need until a parent returns. She runs, conscious that it makes no sense, but continuing anyway, unable to understand why she does. That confusion resonated so strongly with me I put the book down and bawled.


Final take-home lessons for me: probably good that we're moving to Hawaii instead of northern California, for a much easier transition to fully self sufficient homesteading. Take it easy as we go. Focus on communication and relationship. Carefully scale in the addition of people who will demand more of the community than they can immediately repay (children), making sure the community can integrate and support them without undue strain. And enjoy ourselves!

Thursday, June 02, 2011

Perennial polyculture designs: five year review

This is part one of a three part series on perennial polycultures:

  1. Designs: a five year review
  2. Species profiles
  3. New designs

Background

When we first moved to this site in 2006, I designed, on paper, elaborate perennial polycultures for tree understories. In each guild I included at least one plant to perform the main "food forest" functions: nitrogen fixation, nutrient accumulation (generally deep taprooted plants), beneficial insect feeding (plants in the carrot and sunflower families), aromatic pest confusing (onion family and mint family with their strong odors to throw off pests trying to find their preferred plant), spring ephemeral for early season nutrient cycling, ground cover, and foot tolerant path cover. I also wanted all the plants to have some direct human use, whether as food or medicine. And I tried to minimize inter-plant competition by matching vigorous runners with taller clumpers, plus designing for a combination of taprooted, fibrous, and flat rooted plants. I placed plants under each tree according to their sun requirements, designing for a fairly mature tree canopy casting significant shade (with some thought to the transition period of full sun in the early years.) And I matched guilds to tree root patterns, so that a taprooted tree would mostly have shallow rooted plants under it, and vice versa. Example polyculture design (1 MB PDF) I can't call these designs complete failures. The exercise of working them out helped me think through all the factors involved, and helped me learn the on-paper characteristics of many interesting perennial plants. I'm glad I did it. However, I never successfully implemented a single design, for several reasons.

Reasons for failure

Plant (Un)Availability

Our Process

To create my list of desired species, I diligently went through every entry in the species table at the end of Volume II of Edible Forest Gardens by Dave Jacke and Eric Toensmeier, plus all the species rated 4 or 5 in the Plants for a Future database. I added a few plants from books like Simon Hickmott's Growing Unusual Vegetables, local edible plant nursery catalogs, and odd mentions here and there. I came up with a great list of about 175 potential guild plants. I worked from the list to create my polycultures, then began tracking down the plants to implement the guilds. I hadn't anticipated the difficulty I would have locating the plants, even in the form of seeds which posed their own propagation learning curve. Over the last five years I've ordered hundreds of species of seeds from dozens of seed companies, spending hours researching and combing through plant catalogs. (My two most useful plant source search engines: Dave's Garden Plant Scout and UMN's Plant Information Online.) I managed to track down 90-95% of the species on my original list, though I kept adding more species of interest over the years, so that I still have dozens of species I would trial here if we were staying in this bioregion. Of the species I could find, only about 50% grew successfully. The rest never germinated, succumbed to slugs, got outcompeted by other plants, rotted from winter moisture, died with drought, or disappeared while we weren't watching. With the skills I've gained over the years in seed starting and with willingness to provide some extra babying to the most interesting species, I'd probably re-try another dozen or two of those failed species if we were staying here longer.

Repercussions

The long, drawn out process of tracking down seeds over several years, starting them up, waiting for them to get large enough to plant out, and having many of the attempts fail to produce a viable plant meant we never had all the planned species for a given polyculture at once. So my on-paper designs had to adjust to accomodate what I actually had available, with additions over the years as I successfully grew out new plants to incorporate. I still tried to make additions based on the original factors of guild function, top growth, and root patterns, but inevitably my incremental plantings lacked the full integration of my theoretical designs.

Inadequate Knowledge of Plants

I gathered as much information as I could on plant habits, culture requirements, and uses before designing my initial polycultures. But the books can only give so much detail on the intricacies of a living organism's life cycle, don't always accurately describe a plant's response to our particular climate and site, and certainly can't tell us whether we'll actually like eating the plant, or which part(s) we'll value the most, or what time of year we find the plant most useful.

Examples

Size, life cycle, & harvest methods: Skirret

The literature led me to believe that skirret (Sium sisarum) would grow to 3' tall by 1-2' wide. We've found that, on our site, that accurately describes a first year plant with its flowers, but older plants easily reach 5' tall and 3' wide. In mid-summer, after our typical weeks without rain, the first rainstorm or the first irrigation via our sprinkler weighs the foliage down so much that the whole plant flops right over. So my skirret placed carefully 1.5' from the edges of paths fell into them and created a maintenance problem. Other subtle details of skirret's life cycle and harvest methods affect how it integrates with other plants:
  • The roots radiate outwards in all directions from the central crown, necessitating a thorough excavation of the soil to find all the roots. So as opposed to something like garlic with a bulb easy to pull out without soil disturbance, skirret does not work well under trees and shrubs, nor next to perennial greens. Instead, it needs to integrate with other root crops or self seeding annuals.
  • The foliage dies down relatively early in the autumn, before the first frosts, allowing early harvest and potential cover crops or garlic plantings. Many of the roots we grow can't be harvested until November or later, so this timing makes a big difference in polycultures or time niche planning.
  • Skirret top stalks stay visible for several months into the winter, but by late winter or early spring they've rotted off, making it difficult to find the root locations. So it works best to have predictable locations for the skirret, or situations where it doesn't matter if some plants regrow in the spring where we missed harvesting.

Life cycle & harvest methods: Creeping bellflower

Creeping bellflower (Campanula rapunculoides) volunteered in our yard. I identified it, looked it up, discovered it's considered invasive in gardens as it runs rapidly but that the roots are edible, and devised a plan of allowing it to grow in place, with periodic harvesting of the roots from the edges to keep it in check.

Several times I dug up the edges to find the roots, but never found anything larger than spaghetti, tough and fibrous with nothing that seemed actually edible. I wondered whether this was a famine food, or if I had defective plants, or what. Finally I happened to dig into the center of my neighbor's patch of the plant, and discovered numerous sizable roots up to 3/4" diameter and 1' or longer! So apparently the plant only makes large roots over time, and my plan to harvest young roots from the edges won't work.

Parts used: Scorzonera & Dandelion

We originally planted scorzonera (Scorzonera hispanica) as a root crop. Soon thereafter, we learned that the leaves make an excellent lettuce substitute, so the plant became primarily a perennial green, with self-seeded plants as a bonus root crop. So rather than growing scorzonera in frequently disturbed soil in zone 2, we grow it in an undisturbed zone 1 bed. Conversely, we originally considered dandelion (Taraxacum officinale) just a leaf crop, best used during early spring then weeded out. Last year I discovered the roots make an excellent vegetable in their own right, providing a low maintenance root crop in the summer. So now we let the dandelions stay and harvest them from late spring til fall, when more desirable roots become available.

Inappropriate zone placement

I missed a very basic permaculture principle with many of my original polyculture designs. I didn't pay attention to what sort of yields went under which trees in the yard, and their accessibility from our front door. So I had leaf crops designed under trees in the far corner of the yard, which in practice I would almost never get around to harvesting.

Crop balance

When I first designed our guilds, I had no concept of how many leaf crops we would need vs roots, shoots, berries, seeds, etc. Since the perennial plant world offers many greens but relatively few foods from the other categories, I overdesigned leaf crops by default.

Difficulty implementing self seeding annuals

I sometimes consider myself a terrible gardener, such as when I have to admit that I failed--several years in a row--to grow pigweed (Amaranthus sp) and lambs quarters (Chenopodium album). You know, those weeds that gardeners everywhere else persistently pull out of their beds year after year. I tried several different species of amaranth, and at least two of Chenopodium, and I don't think I ever got any to grow the first year, let alone persist as an annoying weed. My original designs incorporated several other self seeding annuals: breadseed poppy (Papaver somniferum), miner's lettuce (Montia sp), land cress (Barbarea verna), corn salad (Valerianella locusta), and some biennials like evening primrose (Oenothera biennis). Only the evening primrose has really succeeded here; the rest never got started or have failed to robustly self seed. I attribute the failures to our heavily mulched, rarely dug soils. The first two years (especially the first), everything had a thick layer of wood chips. I tried spreading a thin 1" layer of soil in some places to seed plants like the amaranth & chenopodiums, but those tend to germinate in late spring or early summer with more heat, which coincides with the end of our rains and thus drying out of those 1" layers of soil. In subsequent years, we had heavy slug pressure, and rarely had bare patches of soil with full sun to support such pioneering annuals, especially late in the season. I did include root crops amongst those self-seeding annuals in my original design, to facilitate creation of bare soil, but with the exception of evening primrose (whose root I dig over the winter), those combinations of digging & self-seeding never really came together.

Spring Ephemerals Not So Useful

I made a small design mistake by including, in each guild, a spring ephemeral as suggested in Edible Forest Gardens. These ephemerals begin growing in late winter or early spring, taking advantage of full sun conditions before shrubs and trees above them leaf out. They flower early in the season, then die back to the ground as shade increases. On the east coast, with its harsher winters and frequent late winter snowpacks, these ephemerals play a crucial role in "catching" nutrients early, preventing snow melt or rains from leaching them out before the woody plants come into growth. In the pacific northwest, we have mild winters with many warm spells throughout the winter allowing some plant growth. In Portland we never get a real snow pack. Here it makes more sense to incorporate evergreens or fall planted crops such as garlic and fava beans. The ephemerals I've tried have competed poorly with other perennials and the late winter/early spring annual weeds.

If I Knew Then What I Know Now...

If I had the opportunity to do this all again, I would:
  • Design with the plants available to me, so I could plant them all out at once. (I would reserve some areas as nursery & trial beds for new experiments.)
  • Plant out low growing or easily removable ground covers everywhere I'm not yet ready to implement permanent designs. Selection criteria:
    • Evergreens preferred
    • Winter leaf crops
    • Berries
    • Duck forage
    I haven't put much thought into this, but some ideas on species:
    • Evergreen violets such as Viola odorata (edible leaves & flowers)
    • Evergreen bellflowers such as Campanula poscharskyana and C. portenschlagiana (edible leaves & flowers)
    • Bunchberry (Cornus canadensis) as a native berry crop. This did poorly in early years, but might succeed now with more shade from maturing trees.
    • Various low growing Rubus species, such as R. nepalensis, R. tricolor, R. x stellarcticus, R. arcticus, R. pentalobus.
    • Strawberries, both garden variety and species (Fragaria sp.)
    • Perennial ground cherries (Physalis sp.)
  • Plant fewer greens, and concentrate them closer to the house since I pick them once or twice a day.
  • Plant more perennial seed crops.
  • Try to design a soil disturbance regime to suit self seeding annual seeds from Amaranthus sp. and Chenopodium sp.
  • Incorporate ducks to reduce slug pressure on leguminous seed crops of favas, peas, and runner beans.
  • Include more evergreens in general rather than spring ephemerals
  • Group root crops together for complementary soil disturbance. I'll post soon with several root polyculture ideas I'm trialing this year.
  • Skip the nitrogen-fixing function from my list of guild requirements. One person can fertilize 4000-5000 square feet of forest garden with urine.

Thursday, April 14, 2011

Rotating Chicken Paddocks - What a Relief!

Chicken Yard Design Mistakes

#1: Sheet Mulching the Lawn

I've made several mistakes in my design for this property. That topic deserves an entire post of its own; for now I'll focus on perhaps my biggest two mistakes. When we moved in five years ago, we started with a big lawn in the front and back yards, which I promptly sheet-mulched to death, with a "take no prisoners" attitude towards grass. We introduced six chickens into the backyard in the first summer, letting them free range through the whole area. When I created our food forest design in the fall, I laid out the back yard as trees and tall shrubs, with the chickens running amok through the understory of the entire area, cleaning up fallen fruit and keeping pest insects under control. I had vague plans to fill in under the trees and shrubs with herbaceous perennials providing chicken fodder or some human use.

Great in theory, but we didn't really understand just how much destruction the little chicken monsters unleash on the ground layer vegetation! We had expected them to peck at things and eat some of the leaves, but we underestimated how many fresh greens they like to eat, and how quickly they can decimate their favorite foods. And we didn't account at all for the constant scratching, here, there, and everywhere, especially around newly planted starts with their loosened soil.


Since I wiped out the lawn, we've never been able to reestablish a solid ground layer of herbaceous plantings, except within a few protected cage enclosures. We have had some success with a few perennials such as the vigorous running Fuki (Petasites japonicus) pictured at right, but nowhere near full coverage. I now wish I had left the grass and weeds in the backyard as pasture, sheet-mulching in specific spots as needed for the trees and shrubs and patches of other perennial herbaceous plantings.


Compare our back yard chicken area (photo on left) with our front yard perennial vegetable garden (photo on right). You have to look a little closely at the backyard photo to see past all the nice looking tree and shrub growth, but note the absence of ground vegetation. Meanwhile, the front yard has solid dense growth except in the paths:


#2: Single Free Range Area

In retrospect, even if I hadn't made the mistake of eliminating the lawn, the 3000 square foot backyard free range area probably wouldn't support six chickens full time free-ranging. In my defense, I hadn't yet come across Paul Wheaton's excellent article on chicken raising before I designed the back yard. He makes a strong case for rotating chickens for one week at a time through each of four or more paddocks, giving the other paddocks at least three weeks to recover between chicken assaults. Had I designed for this from the start, I probably would have put the chicken coop in the center of the area, with a small run with gates opening into each of the four quadrants of the yard. I would have established 50+ gallons of rainwater catchment next to the coop, to provide automatic drinking water for much of the year. I would have laid out the paddocks and paths to maximize ease of human movement.

Not knowing of the rotating paddock concept, I placed the chicken coop at the far south end of the yard, against the north wall of the neighbors' garage, to utilize the heavily shaded space. The coop has a single door which allows the chickens access to the entire back yard to destroy everything everywhere, every day, at will. I placed our rainwater harvesting bathtubs at the opposite, northern end of the backyard, to serve as watering troughs. I laid out the trees and shrubs in a manner not conducive to division of the yard into quadrants.

Correcting the Problem

Even after I read Paul's article, I remained stuck with the original design, because I could not figure out how to set up four paddocks given the existing design limitations. (We also embarked on our major house renovation about that time, which sucked up most of our time over the last year and a half.) But I finally had a break-through epiphany a couple of weeks ago: if I settled for just three paddocks, I could retrofit them into the yard fairly easily!

New Fencing

Design


So I spent a few days last week adding two permanent fences (I don't want an ongoing maintenance chore maneuvering fencing around trees and shrubs), running north-south down the center of the yard, plus an east-west fence along the bathtubs to keep the path along the house wall free of chickens. Tulsi likes this to keep the area as human hang-out area without chicken poop. I like this so humans can use this primary access route without having to deal with gates, many of which I added elsewhere to facilitate human access into and between the paddocks. (The "I"-shaped notations mark gates.) I divided the area into three roughly equal ~16' x ~60' paddocks (~900 square feet) running from the property line at the south end to the bath tubs at the north end. The east and center paddocks have direct access to the bath tubs for the chickens to use as drinking water. We'll have to maintain a watering dish in the west paddock.

In the future, we could add a fourth paddock by running another north-south fence on the other side of the main path center-right in the design scan. We would open up the path against the house, and fence off the side yard of the house, creating ~700 square feet of paddock. It would interfere with free flow between our house and our neighbors', and reduce the desirability of the side yard as a human hang-out area, so we haven't moved ahead with implementing this, just keeping it in mind as an option.

I made a small "courtyard" around the coop, which gives us flexibility in allowing free range time. I hate to keep the chickens enclosed in such a small run, but we may have to do so to control their impact on the paddocks. Since I could only make three paddocks, instead of the recommended four or more, we may even keep them in the courtyard for a full week at a time to substitute for the fourth paddock. And we may use the courtyard as a "sacrificial zone" in the winter, when the paddocks can tolerate even less chicken activity before plants get damaged.

The courtyard layout ensures permanent access to the dry area under the woodshed (labeled "chicken house" in the somewhat out-of-date design scan - the "chicken coop" written in pencil marks the actual chicken coop). No matter which gate I open to let the chickens into one of the paddocks, they can still use the woodshed cover for shelter from the rain and, most importantly, for their dust baths.

The courtyard has already proven itself useful in one more way. I can lure the chickens into it with bread or other food, then close all the gates and easily catch them to put them into their house before dark falls. This allows us to close them up early if we won't be home at dusk after they go in on their own.

Construction

We had plenty of old fencing of various sorts, so I built everything from materials on hand. I loosely anchored most of the wire fencing with vertical bamboo poles interweaved through the mesh, then jammed into the soil as far as I could get them. I built one straight section of fence from bamboo, with many ~4-5' vertical pieces closely spaced, and a few long horizontal pieces to tie them together.

For the gates, I buried solid posts made of black locust limbs cut from our hedgerow (inherently rot resistant) and in a few spots, scrap pressure treated 4x4s for the below-ground part, sistered to untreated scrap 4x4s for the above-ground portion. I constructed the gates from lath screwed together to sandwich chicken wire. After I figured out the first gate, I put together the rest fairly quickly and easily.

Plants

Goals

I've spent the past few days transplanting excess leafy green plants from the front yard into the back yard. I've tested the chickens with new greens to see whether they'll eat them when I hold the leaves for them. Mostly I want to get a solid carpet of greens so the chickens don't eat more than about 30% of the vegetation during each week they spend in a paddock. I'm also planting some seed crops. And if the chickens don't eat some plants at all, the flower activity will feed and bring insects into the back yard. Uneaten plants may even host caterpillars or other insects for the chickens to eat.

Overstocked chickens push plant imbalances into further disequilibrium. That is, they preferentially eat their favorite plants, ignoring their least favorite plants until they've exhausted their first choices. So over time they'll kill off their best fodder, leaving only the substandard fodder. (Overstocked cattle and other animals create the same problem.) So I'll need to keep a close eye on things and make sure I have enough of the best plants, or protect them as needed.

New Plants

  • French sorrel (Rumex acetosa) - they love this stuff--I probably need 14 or more plants per paddock, but I only have available 9 per paddock right now.
  • Sheep sorrel (Rumex acetosella) - we have some of this small running sorrel in the front yard. We rarely harvest it since the larger french sorrel gives us a more convenient harvest, so I'll move some to the back and see whether it stands up to the chickens.
  • Dandelions - in years past, they didn't seem to eat dandelions very much, but now they love them! I've planted about 30 per paddock so far, mostly in paths, and will probably add more.
  • Fennel - the chickens love the calorie crop seeds. I'll probably want at least 6 plants per paddock.
  • Creeping bellflower (Campanula rapunculoides) - they seemed to really like the sample leaves, and this plant spreads rapidly so could stand up well to abuse. If the chickens don't eat it enough to keep it in check, we can harvest the roots for food. I planted about 12 clumps or root cuttings per paddock.
  • Clustered bellflower (Campanula glomerata) - seemed to really like the leaves. I don't know whether the plants will grow vigorously enough to do well. We have a lot of extra potted starts so I figured I'd try out 2 in each paddock.
  • Turkish rocket (Bunias orientalis) - they ate the sample I brought them, but probably won't eat a whole lot of this very bitter leaf. They may eat the flowers and flower buds, or the seeds. I planted 3 per paddock.
  • Sweet rocket (Hesperis matronalis) - Same as for turkish rocket.
  • Wood avens (Geum urbanum) - Not very excited about the leaves, but they ate some of the sample. I planted about 5 per paddock.

Existing Plants

We had actually fenced the chickens out of a 500 square foot area closest to the house during our house construction, and we kept them fenced out for the last year to give it a chance to revegetate. Now we're letting them back into that area as part of the new paddocks, and they're now eating established:
  • Kale - number one favored plant, followed closely by french sorrel. Eat it to bare stems.
  • Purple dead nettle (Lamium purpureum) - eat it to the ground.
  • Popweed / Bittercress (Lepidium something) - eat it to the ground.
  • Scorzonera (Scorzonera hispanica) - eat it to the ground.
  • Spearmint (Mentha spicata) - not their first choice, but they do eat it in smaller quantities along with the rest of the greens, eventually eating it to the ground.
  • Comfrey (Symphytum officinale) - Bizarrely, they aren't touching this stuff! In years past they ate all the comfrey to the ground, severely weakening or even killing many plants. I don't understand why they don't like it now, but hopefully they'll start eating it later in the season.

Sunday, February 27, 2011

Our graywater system

We now drain all our graywater to the yard: kitchen sink, bathroom sink, bathtub, and washing machine.

Washing Machine

I set up the washing machine a few weeks ago, using Oasis Design's "laundry to landscape" method, which relies on the pump of the washing machine to move the water. This allows us to send the water slightly uphill, into our backyard "shrub thicket" of blueberries and serviceberries, where a gravity-fed system couldn't reach.

PE Pipe Exiting Garage
Our washing machine drain pipe wasn't the right size or type to use a barb to transition directly to the 1" polyethylene (PE) pipe. So, I used large-ish hose clamps (metal ring with a screw that ratchets the clamp smaller and smaller as you tighten the screw) to attach the washing machine drainpipe to a rubber tube we had around, which then attaches to the PE pipe. We placed the washing machine against the south wall of the garage, where I drilled a hole just large enough for the pipe to exit the garage. I included a vertical piece 6' tall to allow proper venting and as an overflow escape if something clogs the pipe. This prevents burning out the washing machine pump.

Pipe Layout
The pipe extends about 10' due south from the garage wall, then takes a 90 degree turn to the west before running another 30'. I drilled 1/4" holes into the bottom of the pipe every 2' or so. We'll use stumps and logs to pin the pipe into place, preventing the chickens from moving it around.

This pipe doesn't work perfectly yet. Despite my efforts to raise up the path next to the garage wall (see the bare dirt in the first picture above), the pipe still dips down before heading gradually upslope to the discharge points. This means most of the water exits through the first couple of holes, and that the last bits of water stagnate in the low spot by the garage wall. I may reconfigure the setup so the pipe still dips to cross the path, but then immediately jumps up and anchors to the black locust trunk visible in the picture above. That would allow a continuous feed downhill to all the discharge points, giving a fairly even irrigation pattern. I can add a joint or cleanout valve or something at the garage wall low point to remove crud that builds up, or drain the hose before hard freezes.


Sinks & bathtub

The rest of the house drains feed a mini constructed wetland in the front yard, which lies slightly below the house, allowing gravity fed flows. If we didn't have to worry about house resale, we could have done what Oasis Design calls "radical plumbing", just piping each drain directly to the outside with one 1" polyethylene pipe for each drain. In that scenario we wouldn't need any vents or p-traps or larger pipe, since we wouldn't have a connection to the sewer system. However, we're including a plumbing valve under the house so that the graywater can be sent either to the wetland or to the sewer, so we needed to use standard 1.5" ABS pipe complete with vents to the roof.

The wetland resides in an old fiberglass jacuzzi I got for free from craigslist years ago, about 6'x4'x3'. I plugged up all the holes in the tub using rubber patches and 100% silicone caulk. In 2007 or 2008, I dug a big hole in the front yard, just across the main path running by the north edge of our house, and buried the hot tub pretty close to level, but making sure it tipped slightly away from the house, so the overflow would drain into the adjoining garden bed. I made the top of the tub level with the path, or perhaps even slightly lower. Over the years we've built the paths up several more inches, so the tub is now uncomfortably low. Back then, I wanted to make sure we could gravity feed from the house drains into the tub, and we did not yet have plans to lift the house. Had I known then we'd wind up raising the house 3', I'd have made the tub higher. Woulda saved me some digging, too!


Original wetland, marble slate overflow, & hole dug for new bath tub

Molded dirt and marble slate for overflow
We put a few inches of dirt into the bottom of the tub, and planted it with cattails, rushes, wapato, and tule. For a couple of years, we just dumped graywater directly into the tub from 5 gallon buckets placed under the kitchen and bathroom sinks. We had no access to the underside of the house, so no way to use the bathtub graywater.

At some point I buried a bath tub (again, free from craigslist) to receive the overflow from the wetland. I leveled the new bath tub to overflow away from the house again, to keep moving any excess water further into the garden bed area. I tried to strategically compact dirt to control the wetland overflow location, and to use a scrap piece of marble slate to catch the water and carry it down to the new tub. Unfortunately, lots of water seeped through the dirt and was lost to the soil in the surrounding paths. The marble slate wasn't quite long enough to properly reach between the tubs, so we lost yet more water. All in all, probably 20% or less of the input water made it into the second tub.

Furthermore, the water in the wetland stagnated somewhat, smelling a bit nasty when we pulled it up from the bottom of the tub. When we poured graywater into the tub, it followed the path of least resistance, mostly across the surface of the tub straight to the overflow area. So we were concerned that the plants weren't having a chance to purify the water much. We decided to follow the method described in Toby Hemenway's Gaia's Garden, and fill the wetland with gravel and baffles. The rocks in conjunction with the oygenating plant roots supposedly help create a combination of aerobic and anaerobic sites for microorganisms to live, eating the other microorganisms and solids coming in with the graywater.

Our friend Nat loaned us a concrete mixer, and helped me make a run with his trailer to buy half a cubic yard of 3/4" gravel. We held a work party and used the mixer to wash off the rocks, to minimize the dirt we'd be introducing into the system. (Dirt will eventually clog up the spaces between the gravel and dramatically slow the water flow through the wetland.) We placed a vertical inlet pipe into the end closest to the house, and another vertical pipe near the overflow area; both pipes have many holes drilled into them to allow water flow. We placed larger river rock (~1.5"-3", a byproduct of my excavations under our house) around those pipes. I based this decision on the literature I read; I think it helps with allowing optimal water flow, or perhaps it helps trap the gunk coming in from the house without clogging up the smaller rocks?

We filled the rest of the tub with the smaller gravel, building up vertical baffles using sturdy scrap plastic (mostly square lids from 4 gallon buckets). The baffles force the water to take a long, circuitous route right, then left, then right, then left through the wetland, giving the plant roots the most time possible to clean the water before it finally overflows at the far right edge of the tub.

Current setup - second tub in background
The drain pipe from the house will enter into the vertical inlet pipe (foreground), dropping the graywater to exit through the drilled holes and begin its journey through the wetland. I still have to finalize the plumbing under the house, so the pipe into the wetland temporarily discharges onto the surface (smear of goop at lower left), rather than into the inlet pipe. I installed the second vertical pipe near the overflow area (not visible, as it extends only 2" above the surface) to allow insertion of a siphoning hose; supposedly it helps the plant roots penetrate deeper down if you drain all the water out now and then. I've only tried once to siphon the water, with partial success; I dropped the water level by maybe 6", but couldn't get more than that to work. Partly I ran into difficulty starting the siphon without getting my mouth all over a graywater-smeared pipe; some sort of mechanical suction device may help with this. Finally, we replanted the old cattails, tule, and rushes, and topped everything with some wood chip mulch.


Ready to install pond liner scraps for new overflow
A few months ago, I fixed the overflow setup, by replacing the marble slate with some scrap pond liner from our ecoroof project. Now most of the overflow makes it down into the second tub.

I assume in the winter, with the wetland plants dormant, we get very little treatment, so I'm careful not to use the water from the second tub for anything where contamination may cause problems. In the summer I feel comfortable using the water to irrigate, rinse roots, wash my hands, etc. However, we haven't done any water quality testing, which would be necessary to establish how well the wetland actually treats the water.

Saturday, September 04, 2010

Polyculture summary: stinging nettle & Ribes sp

Years ago, I read somewhere (maybe in Patrick Whitefield's How to Make a Forest Garden?) that Robert Hart (food forest originator and pioneer in England) allowed the naturally occurring nettles in his garden to grow up through his gooseberries and currants. The nettles provided many functions, including their normal nutrient accumulation, caterpillar host, delicious human spring green vegetable, and host for early harmless aphid species allowing aphid predator populations to build up in preparation for arrival of pest aphids on other plants. But Hart specifically allowed them to grow amongst his Ribes species because gooseberries and currants can take a lot of shade, such that the nettle supposedly didn't interfere with their crop, and the nettles kept birds out of the berries. Once harvest time arrived, Hart would cut the nettles down and use them as rich mulch, and harvest the berries.

I planted Urtica dioica (seeds from Horizon Herbs) nettle amongst our gooseberries and currants as a precaution against bird predation, and as a way to work nettles into the yard in a useful way. So far we haven't had problems with birds eating anything in the yard, except for scrub jays going for our hazelnuts. We get some birds in the yard, eating some seeds (bushtits eating parsnips, goldfinches & nuthatches & downy woodpeckers eating mullein), some cherries, some berries; but so far no major wipe-out-the-crop harvests. We don't mind sharing some!

Unfortunately, our Ribes have not done very well in terms of crop yield. We planted them in fall of 2006, so have had three years for possible harvests. I forget whether anything notable happened in 2008, but they may still have been establishing. Last year (2009), they got hit badly by an outbreak of currant sawfly caterpillars, who feed on the leaves of currants and gooseberries and stripped some of our bushes almost totally bare of leaves. I noticed their frass (poop) early on, but thought it was dirt the chickens had kicked up onto the leaves. Not until a week later did I notice the leaves being devoured and associate the frass with the worms. I immediately started hand-picking worms to introduce them to the chickens; then started shaking the upper branches to send worms to the ground for the chickens to devour; and after a few days trained the chickens to look on the lower leaves for worms. The chickens did regular patrol of the bottoms of the shrubs from then on, and I shook down the upper branches every few days, and we got the sawfly population under control to the point where the bushes all recovered fine, but they didn't bear any fruit last year. Note: I don't attribute these sawfly woes to the nettle; I just figured I should write up this experience while I'm at it.

This year, we had a few sawflies, but not too bad. We had hundreds of gooseberry fruits developing, and all looked promising. Then, while we were out of town for a week, much of the developing fruit vanished! Maybe birds came through and ate them (though I doubt it, since they hadn't ripened yet.) Maybe the bushes just dropped their fruit in the same way many fruit trees do a "June drop" of poorly pollinated or over-abundant fruit. (I heard from someone else in town that their gooseberries did the same thing.) But possibly we had problematic competition between the nettles and the Ribes, for either sunlight (seems unlikely given the shade-tolerance of Ribes), nutrients such as nitrogen (possible, though I do pee on the nettles & Ribes a lot, and the nettles are supposed to be deep-rooted and supplying nutrients to a polyculture), or water (most likely, since we don't water much during our three month drought season.) Even without specific disease or pest problems, our Ribes wound up looking pretty ragged by now, with curled and browned and maybe some yellowed leaves. So between the poor fruit yields and the general sadness of the plants, something isn't working.

Nettles are a pain. Duh. Managing nettles growing through fairly densely branched Ribes shrubs is an awkward pain. Trying to maneuver my hands down into the bottom of a sharp-thorned gooseberry bush to cut down nettles is a pain from two fronts.

Nettles grow fast! They stayed quite manageable for the first two or three years, but this year they've gotten established enough to really take off. They've spread runners into the paths (both the small 1.5' paths between Ribes shrubs in the tree understories, and into our main 2' and 4' paths between trees). It now requires more than an annual chopping of the nettles to keep them out of our way; I have to go in every week or two in the spring to cut them out of the paths. Of course, a lot of that maintenance dovetails well with harvesting them as my favorite spring vegetable. But once they start to flower, you're supposed to stop eating them because their calcium oxalate crystals can damage your kidneys, so at that point I'm just chopping (ouch! it stung me. ouch! damn gooseberry thorn.) the nettles to keep them out of the paths and try to open up some sunlight for the Ribes. And this kind of work, though it occurs in shorts & t-shirt warm weather, really demands pants and long sleeves to minimize masochism--which means I have to dress up special for the job. I haven't dressed up real special since I got old enough for my mom to stop dragging me to church; and I haven't dressed up semi special since I quit my corporate business casual job, and I don't often get around to dressing up special for the nettles either. So the paths get more and more overtaken and the Ribes seem to suffer and we got hardly any berries this year.

When we do get around to chopping back the nettle, we're now ripping out as much of the root as we can get, to slow it down a lot more than just cutting the aboveground growth would. I don't think we'll try to totally eradicate it, but we'll do more to set it back. In my next yard design, I'll definitely still include nettle, but as its own patch where I can just chop it back with a machete from the edges to keep it in check, rather than having to maneuver through and around other vegetation or branches to get at the nettles. I might try planting a shade tolerant low-growing evergreen (violets?) to provide a solid ground cover through the full yard. And for Ribes, I'll try a less robust and non-painful vine--perhaps annual garden peas or annual or perennial beans or Apios sp (groundnut) or Lathyrus tuberosus (earth chestnut - I did plant this originally in 2007 with the Ribes, but they've never taken off--maybe from chicken abuse, or maybe not enough water. Two plants were still alive early this spring, but growing slowly and definitely getting shaded out by the nettles. I wasn't able to find the plants a month ago.)

In conclusion, in the future, unless we have active bird predation problems, I would not plant a combination of nettles and berry shrubs again. Especially not nettles & thorny shrubs!